Lights, my friend, are not just for guiding you from your car to the front door; they can *transform* your backyard into a stunning spectacle. If you’ve ever gazed at your junipers and thought, “How can I make these prickly little guys look like a star in a Hollywood movie?” then you’ve clicked on the right article. With a bit of ingenuity and a dash of creativity, you can achieve a jaw-dropping illumination that highlights the unique beauty of these evergreens. Dive in, and let’s uncover the secrets to making your junipers shine brighter than your neighbor’s holiday lights!
Key Takeaways:
- Positioning: The placement of landscape lights is crucial; positioning them at different angles can create depth and highlight the unique shapes of juniper plants.
- Type of Lighting: Utilizing a mix of warm and cool lighting can enhance textures and colors, making juniper displays more visually striking.
- Wattage and Brightness: Choosing the right wattage and brightness ensures the lights complement rather than overpower the juniper, maintaining a natural look while adding drama.
Choosing the Right Landscape Lights
The secret to enhancing your juniper displays lies in selecting the right landscape lights. With a plethora of options available, understanding each type can help you create that dramatic flair you’re aiming for. You wouldn’t dare illuminate your prized junipers with a dim bulb that would make them look like they’ve just emerged from a particularly long winter’s nap, right? So let’s dive in!
Types of Landscape Lights: LED, Solar, and More
Landscape lighting can be broadly categorized into several types, but two stand out due to their wide usage and efficiency: LED and solar lights. LED lights are favored for their longevity and energy efficiency, often boasting lifespans exceeding 25,000 hours. Plus, they’re available in various colors and designs, making them versatile enough to suit any juniper arrangement!
| Type | Description |
|---|---|
| LED | Lasts longer and saves on energy costs. |
| Solar | Easy to install and eco-friendly. |
| Incandescent | Produces warm light but consumes more energy. |
| Halogen | Charming and bright but less energy-efficient than LEDs. |
| Battery-operated | Portable and can be used for temporary displays. |
This diversity allows you to tailor the lighting to your specific juniper needs, whether it’s a party ambiance or just snazzy evening strolls through your garden.
Considerations for Juniper Displays: Color Temperature and Lumen Output
Temperature and lumen output play vital roles in achieving the radiance you desire. When you think of temperature in landscape lighting, we’re not discussing the weather, but rather the color temperature – which is measured in Kelvins (K). You’ll want to select bulbs that can either emit warm tones (around 2700K) for a cozy vibe or cooler tones (around 5000K) that give off that bright, daylight feel.
| Color Temperature (K) | Effect on Junipers |
|---|---|
| 2700-3000K | Warm light that enhances natural colors. |
| 3500-4100K | Neutral light highlighting textures. |
| 5000-6000K | Bright light that mimics daylight. |
| Above 6000K | Cooler tones can wash out colors. |
| High CRI | Ensures colors appear more vibrant. |
Output is where things really start to get fun. Lumen output measures how bright your lights will be – think of it as the way your junipers are strutting their stuff under the glow of the evening sky. Too much brightness, and you risk washing out the subtle hues of your junipers, while too little could have your landscape looking like a scene from a horror movie.
| Lumen Output | Brightness Level |
|---|---|
| Less than 100 lumens | Good for ambiance and pathway lighting. |
| 100-300 lumens | Suitable for highlighting smaller plants. |
| 300-800 lumens | Great for larger plant displays like junipers. |
| 800+ lumens | Bright and ideal for security lighting. |
| Wattage Consideration | Be mindful of energy consumption and lumens produced. |
By correctly balancing color temperature and lumen output, you can turn your juniper displays from ho-hum to “Wow, what a show!” You’ll create an enchanting atmosphere without blinding a fellow sipper of sweet tea. Just remember to test, tweak, and adjust until you find that perfect luminous cocktail that makes your landscape the talk of the town — or at least the backyard barbecue! So, go on, light up your junipers and let their beauty shine!”
Designing a Dramatic Display
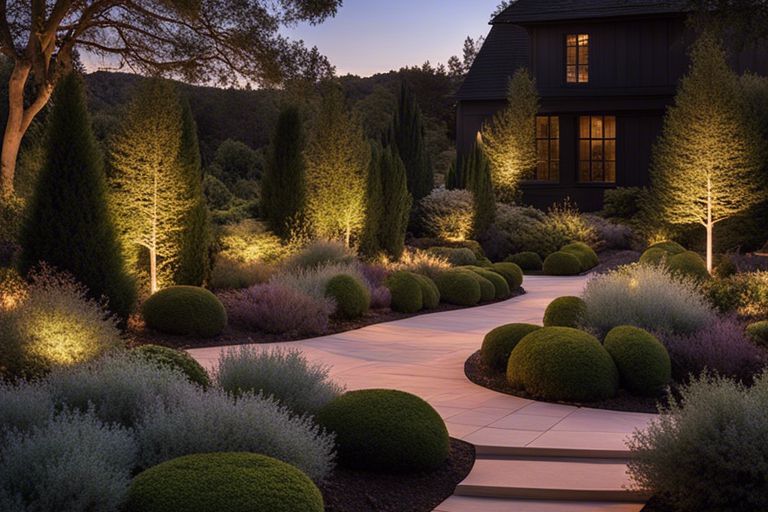
It’s time to channel your inner landscape architect and create an enchanting atmosphere with the help of landscape lighting. Imagine transforming your garden into a dramatic wonderland where your junipers take center stage, thanks to some smartly placed lights. The trick lies in understanding how to manipulate natural and artificial light. For a little extra assistance, check out this guide on How To Create Dramatic Landscape Lighting Effects. You’ll discover the secrets to turning ordinary foliage into extraordinary nighttime spectacles.
Creating Focal Points with Uplighting
Points of interest in your landscape should feel like the stars of a theatrical performance, and uplighting is your spotlight. Picture this: a strategically placed light brightening up a robust juniper, creating shadows that dance and sway like they’re auditioning for the part of your garden’s leading role. This style of lighting not only brings depth to your display but also elevates the natural beauty of your junipers, making them the main attraction, even in the darkest of nights.
Accentuating Texture with Downlighting
Accentuating texture is where your junipers start to strut their stuff, showcasing the intricate details that may otherwise go unnoticed. By positioning lights above the junipers, you direct beams downward, creating a breathtaking play of light and shadow that emphasizes the foliage’s complexity. This enhances the visual interest of your garden, allowing the array of greens, blues, and silvery hues to shimmer in the night.
Focal points crafted with downlighting highlight the architectural details of your junipers, creating a chic and modern look. It’s like the tasteful application of makeup: just enough to enhance what you already have without overpowering your natural beauty.
Using Pathway Lighting to Guide the Eye
The simple act of walking becomes a captivating journey when you incorporate pathway lighting into your design. Imagine little lights lining your garden paths, subtly leading your guests towards the breathtaking junipers you worked so hard to showcase. By illuminating the ways to your fabulous displays, you create a magical setting that invites exploration and admiration. Not to mention, it enhances safety while providing a charming ambiance that could even make your garden gnome consider getting a job as a night tour guide!
Display your clever pathway lights in a way that leads leading the eye directly toward those lush, dramatic junipers. Not only do they keep unsuspecting guests from twirling into a rose bush, but they also create a deliberate visual flow that enhances the overall experience of your landscape. Just think of it as your garden’s very own yellow brick road—one that would give Dorothy a run for her money!
Juniper-Specific Lighting Techniques
All the world knows that lighting can transform your garden from “meh” to “magnificent.” However, when it comes to junipers, it’s important to apply some specific techniques to really showcase those needle-like leaves and architectural forms. Think of them as the dramatic lead in your outdoor play, and you, my friend, are the director. With a smart lighting strategy, your gender-neutral shrubbery can take center stage, complete with backlighting and a standing ovation from your bewildered neighbors.
Highlighting Unique Branching Patterns
The key to making your junipers shine like the stars they are lies in understanding the magnificent branching patterns they offer. These cold, stoic evergreens are often misunderstood, but with the right spotlight—figuratively speaking, of course—you can illuminate their unique configurations. Focus your lights at different angles to delineate the textural contrasts formed by the overlapping branches. It’s like giving your junipers their own fashion show, where each branch struts its stuff under the spotlight, making for a jaw-dropping spectacle.
Even your slightly-too-close neighbor, Karen, will have to admit it’s an impressive display. So remember, when it comes to landscape lighting, especially for junipers, don’t just throw up some random lights like you’re decorating for a third-grade party; be intentional and strategic. Once you’ve highlighted those unique branches, the interplay of light and shadow will create a sense of movement—like watching the slow-motion dancy bits of a vintage music video.
Creating Depth with Layered Lighting
On the topic of depth, your landscaper’s dream should include multiple layers of light that interact beautifully. You want to create a depth that draws the eye in, much like a good novel—it beckons you just to keep turning those pages. Use uplights to cast shadows of the juniper’s silhouette on nearby walls while soft, ground-level lighting grazes the edges of the foliage. This technique adds an enticing dimension, creating an alluring three-dimensional enchantment.
Creating depth also means you’ll need multiple light sources. Consider mixing up the intensity, color, and placement to enrich the visual experience. Think of it as your own personal “sink or swim” lighting situation; if it’s too flat, it’ll sink! But with layers that pop, your lighting will elevate the spectacle, turning your junipers from garden-variety to grandiosity.
Making the Most of Juniper’s Natural Shapes
Most home gardeners miss out on the incredible opportunity to accentuate the inherent aesthetics of junipers. Each juniper variety has distinctive shapes and forms—some may be tall and spiky, while others possess a more cascading presence. To do them justice, position your lights in such a way that they reflect these shapes, turning each plant into a living piece of art. You wouldn’t hang a Picasso in the bathroom, would you? So, choose your lighting locations wisely!
Lighting your junipers effectively means merging artistry with science; it’s not just about blinding your neighbors. You want to highlight their natural shapes and forms with varying angles and colors. Some lights will create a warming glow, while others may cast cooler shadows. Your design should complement these differences, producing an array of visuals that keeps your yard engaging and enticing.
Lighting your junipers well is akin to giving them a spa day. They deserve the best. The right light brings out those earthy tones and takes advantage of their already stunning design, leaving you with an outdoor space that radiates beauty without requiring a second mortgage.
Balancing Light and Shadow
After you’ve set the stage with your beautiful junipers, the next act is all about balancing light and shadow to create a dramatic atmosphere. You might think of lighting as a one-dimensional affair, but trust me, like a fashionista picking the right accessories, you need to know how to play with both light and dark. It’s the contrast that elevates your landscape lighting game from ‘blah’ to ‘wow,’ creating depth and intrigue. The beauty of your junipers will shine—literally—against this backdrop of contrasts.
The Importance of Contrast in Landscape Lighting
Light is not just light; it is the magic wand that highlights the natural contours of your juniper displays while creating a symphony of shadows. Using bright, focused lighting on the junipers brings out their textures and colors, while the surrounding areas that remain dim cast alluring shadows. This interplay ensures your landscape doesn’t turn into a sad, flat storyboard in a bad play. Instead, it becomes an engaging narrative where your junipers take center stage.
As you walk through your garden, you’ll notice how nighttime transforms it into an enchanting realm. The shadows serve as the perfect foil to your brilliantly lit plants, creating a backdrop that draws the eyes—and maybe the neighbors—to your yard instead of their own. Note, contrast is key, and using it wisely means your garden will feel like the dramatic finale of the best show in town.
Using Shadows to Create Visual Interest
With the right setup, shadows can be your unsung heroes, quietly enhancing the visual appeal of your landscaping. Think of shadows as the secret agents of your garden design. They lurk and mingle, adding layers of complexity to your thoughtful juniper arrangement. Each shadow can create movement, providing a fleeting glimpse of something mysterious and inviting visitors to explore further. Your landscape lighting should be like a skilled magician—drawing eyes to the light while letting shadows play nicely in the background.
Create intentional shadows by positioning your lights thoughtfully. Each placement can sculpt shadows that stroke the ground beneath your junipers, making them look even more majestic and vibrant. Shadows can also work wonders when they come to intertwined plants, as they can create striking silhouettes that are nothing short of art installations. The more you play with light, the more captivating your landscape becomes—turning a momentary glance into a lingering stare.
Avoiding Overlighting: A Common Mistake
Landscape lighting is a beautiful balancing act, but there’s one common pitfall that many fall into: overlighting. Imagine walking into a party where every single light is cranked up to eleven. Not only does it impede your ability to appreciate the ambiance, but it can also create harsh, uninviting spaces. The last thing you want is your garden looking like a poorly lit diner that forgot to pay its electric bill; instead, you want a warm, inviting retreat. So, be kind to your junipers and watch that light output like it’s going out of style.
A beautiful evening garden experience lies in the delicate dance between light and shadow. Aim to light your junipers just enough to highlight their beauty while letting the shadows do their job. Avoid the urge to drown everything in light! With a thoughtful approach to your lighting design, those subtle, gentle moments will transform your junipers into a star-studded display, rather than something that evokes an image of your high school gymnasium during a pep rally.
Installing Landscape Lights Like a Pro
For those of you who view gardening as a series of long, sweaty battles against nature, installing landscape lights can feel like a triumph over the darkness… quite literally. Before you wield that power drill like a medieval weapon, it’s important to have a solid game plan. Begin by planning for power sources and wiring. This first step is like deciding whether to use a butter knife or a sword—one will accomplish your goals a lot more effectively. Assess your power options: are you using a GFCI outlet nearby, or do you need to run an extension cord from the garage that takes the long way around, thus making you question your life choices? Make sure that you have enough power for all your glorious lights. Don’t let your strategic genius stop there—sketch a rough outline that indicates the best locations for each fixture, along with the lines where the wiring will run.
Planning for Power Sources and Wiring
On top of that, remember to choose cables that can withstand the rigors of outdoor use. You wouldn’t wear satin in a rainstorm, right? Guage the wire thickness based on the distance from your power source to the lights themselves. If you’re dealing with a long run, you’ll want a thicker wire to prevent any resistance—that magical phenomenon that has something to do with science and a whole lot to do with your lights not functioning properly. Assess the lighting needs of your junipers, considering if you want a subtle glow or something that screams, “Look at me, I’m a juniper!”
Tips for Burying Wires and Hiding Fixtures
On the flip side, while you may be excited about illuminating those junipers, you don’t want your wires to look like a bad haircut. The goal is to bury the wires and hide fixtures effectively so that your garden doesn’t resemble a war zone. Aim for a shallow trench, about 6 to 12 inches deep, where you can lay these wires. This trench should not resemble a grave for unfortunate garden gnomes but rather serve a more practical purpose. Once secured, allow for some slack in the wire—after all, it needs a little wiggle room to avoid permanent tension. Next, let’s consider those fixtures. Strategically place them behind your gorgeous junipers so that they illuminate from the back, creating a magical aura. Recall, it’s all about that spotlight—you want your junipers to feel special!
- Don’t let your wires look like spaghetti; hide them like the ninja they were born to be.
- Consider the lighting direction like you’re fluffing a pillow—strategically!
- Knowing this will elevate your gardening game and impress your neighbors.
Hiding those pesky wires doesn’t have to be a task filled with tears and frustration. Best practice involves planning your garden layout wisely, selecting plants that will help camouflage the wires while looking naturally beautiful. You might consider installing the wires along garden edging, planter boxes, or even blending in with existing plants; there’s no need to let them become an eyesore in your carefully curated outdoor space. Just remember: you want people to enjoy your garden, not rummage through it like they are searching for hidden treasure.
- Enlist the help of foliage; it can be your best teammate in this stealth mission.
- Use landscape fabric to guide where you lay your wires for a smooth transition.
- Knowing how to hide your wiring will make you the secretive superhero of your neighborhood!
Troubleshooting Common Installation Issues
Issues may arise during installation that could baffle even the most seasoned DIY warrior. From lighting not functioning to tripping breakers faster than you can say “yield,” troubleshooting is a rite of passage. Always double-check your connections before you throw in the towel. You want to ensure that everything is plugged in properly, as interferences from other electrical sources can wreak havoc on your lighting plans. If a fixture isn’t lighting up, check the bulb first—sometimes all the brilliance in the world cannot compete with a simple burned-out bulb. Also, consider the infamous ground faults. They are like secret agents in your electrical system, and they reveal themselves when you least expect it.
For instance, ensure that your wiring isn’t damaged or overly exposed to the elements. If you discover your wires looking like they were gnawed on by rogue squirrels, it might be time for a little patchwork. Incorporate some well-placed electrical tape or water-resistant junction boxes to seal any potential leaks. Equip yourself with a multimeter to test electrical connections, because you want to avoid any shocking experiences (literally).
Maintenance and Upkeep
Your beautiful juniper displays deserve regular attention to maintain their stunning presence in your landscape. Think of maintenance as an ongoing romance—with your landscape lights leading the dance. Not only does proper upkeep enhance their functionality, but it also ensures that their charm is wrapped around your garden like a twinkling string of fairy lights at a particularly festive gathering. So, let’s explore the nitty-gritty of caring for those lights that are melting hearts and illuminating your junipers.
Cleaning and Inspecting Landscape Lights
Upkeep includes cleaning, a delightful task that involves almost no romance whatsoever. You’ll want to brush off any dirt, grime, and pesky leaves that may have thought they could come to your gorgeous light show uninvited. Regularly inspecting your landscape lights means not only cleaning the lenses but also ensuring that the actual fixtures are free from damage. Keep your eyes peeled for any signs of wear and tear, as it’s much better to address issues early than to wait until the lights dim and your garden turns into a dimly lit haunted house.
In addition, giving your lights a gentle wipe with a damp cloth will help keep their shine intact. If you notice any corroded wiring or broken fixtures, do not hesitate to channel your inner DIY guru or call in the pros. After all, these beauties deserve a thorough inspection to keep their flirtatious glow alive and well!
Replacing Bulbs and Fixtures: A Schedule
The bulbs in your landscape lights are the unsung heroes of the garden, providing the sparkling ambiance that transforms a mundane evening into something magical. Creating a schedule for replacing bulbs is vital to maintain the aesthetic appeal of your juniper displays. Just like you wouldn’t show up to a cocktail party wearing yesterday’s outfit, your lights deserve a timely refresh of their own. Aim for a thorough inspection of lights every six months and replace any bulbs that appear dim or burnt out.
Making notes on when each bulb was last replaced can be a game-changer in staying ahead of the lighting curve. Replacing fixtures also falls into this schedule; often, it can be the underappreciated aspect of maintaining a bright and welcoming landscape. Designate a check-up season where you’ll evaluate everything, including bulbs, wiring, and connections. Think of it as your garden’s regular check-up at the Spa of Luminescence.
Schedule this enlightening routine around the changing seasons to ensure you have the right ambiance for those outdoor gatherings—from summer soirees to winter wonderlands. Not only does this keep your lighting game strong, but it also allows you to revel in the gorgeous effect of your well-maintained junipers.
Seasonal Adjustments for Optimal Display
Fixtures of your landscape lights may need a little adjustment as the seasons change. During the spring and summer months, consider repositioning them for maximum effect. Wouldn’t you want to highlight those vibrant green hues of the juniper under the dazzling moonlight? Adjusting the angles of the fixtures can cast dramatic shadows that enhance the natural texture of the junipers, allowing their unique shapes to shine through like stars in a midnight sky.
Conversely, as autumn arrives, be mindful of fallen leaves that tend to play the role of protective blanket over your wires or even your light bulbs. Ensuring that your fixtures are aimed correctly can help mitigate the aesthetic dilution caused by autumn foliage. This simple seasonal adjustment can dramatically enhance the visual appeal of your outdoor scene and keep the twinkle in your juniper display!
Understanding the nuances of how seasonal lighting plays with your landscape is key to achieving an aesthetically pleasing result. Take some time to observe how the light interacts with your plants at various times of the year, then embrace the art of adjusting as required. After all, just like any good relationship, your lighting should adapt to the changing seasons to keep the spark alive.
Final Words
Drawing together the art and science of illuminating your beloved junipers, it’s clear that the secrets to achieving that dramatic display go beyond just flipping a switch. Tastefully chosen landscape lights can morph your garden from “meh” to “marvelous” faster than you can say “landscape architect.” You hold the power of light in your hands, or rather, in your garden, ensuring every juniper’s curve and texture gains the spotlight it deserves. With strategic placement, color choices, and angles, those prickly companions will look less like your cranky uncle from Thanksgiving and more like the star of a botanical Broadway show.
So, as you initiate on your illuminating journey, remember that discretion is the key. Your ultimate goal is to seduce the viewer’s eye without overwhelming it like a disco ball in a serene meditation retreat. Embrace the nuances of shadows and highlights; let the natural beauty of your juniper design shine through while adding a subtle sparkle. With the right lighting, your garden will become a go-to destination for everyone seeking inspiration – or, at the very least, a place to snap the perfect Instagram story for their followers. Happy lighting!
Q: How can I position landscape lights to enhance the visual appeal of my juniper displays?
A: Proper positioning of landscape lights is crucial for highlighting the texture and color variations in juniper plants. To create a dramatic effect, use a combination of uplighting and downlighting. Place lights at the base of the junipers to cast a soft glow upwards, which will accentuate the plant’s natural shape and foliage. Additionally, consider spacing the lights evenly around the display to avoid harsh shadows. Experiment with angles, aiming for 30 to 45 degrees, to find the optimum direction that creates an appealing silhouette against the evening sky.
Q: What types of landscape lights are best suited for highlighting juniper displays?
A: LED landscape lights are particularly effective for illuminating juniper displays due to their energy efficiency and longevity. Opt for adjustable floodlights or spotlights that allow you to customize the brightness and spread of light. Warm white LED lights tend to create a more inviting ambiance that complements the earthy tones of juniper. Additionally, consider using color-filtered lights for special occasions to create unique effects that can make your juniper displays stand out even more.
Q: How can I ensure that my landscape lighting enhances security while highlighting junipers?
A: To balance security with aesthetic appeal, strategically place motion-activated landscape lights around the perimeter where the junipers are located. These lights should provide sufficient illumination to deter intruders while also creating atmospheric lighting for the plants. Use a layer of softer ambient lighting to wash over the junipers and combine it with brighter security lighting at key points. This layered approach ensures safety while enhancing the natural beauty of the landscape, making your yard both secure and visually appealing.