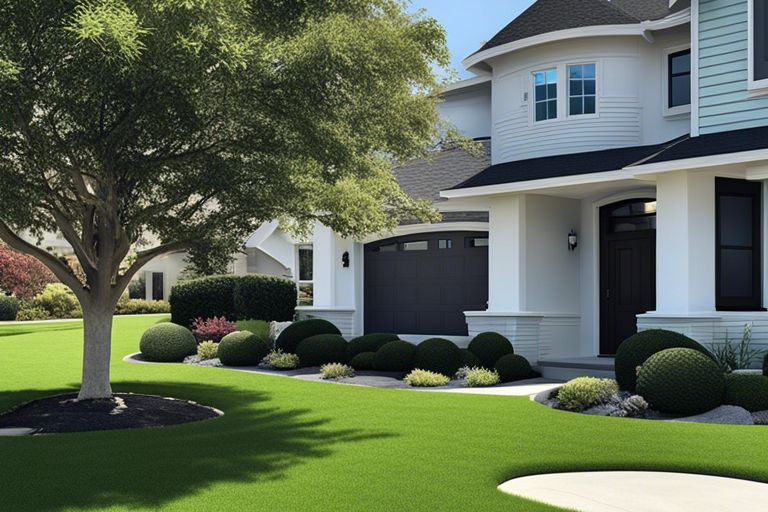
There’s nothing quite like a stunning black slate patio to enhance your outdoor space. In this guide, you’ll discover important tips and tricks to help you lay a beautiful patio that will impress your family and friends. From selecting the right materials to mastering laying techniques, you’ll gain valuable insights on avoiding mistakes that could lead to costly repairs. Get ready to transform your backyard into a stylish retreat, as you learn how to create a patio that not only looks incredible but lasts for years to come.
Key Takeaways:
- Choosing the Right Slate: Opt for high-quality black slate that complements your landscape and ensures durability for long-lasting patio use.
- Preparation is Key: Properly preparing the ground is crucial; ensure the area is level and well-drained to prevent water accumulation and damage.
- Sealing and Maintenance: Regularly seal your black slate patio to protect it from stains and weathering, enhancing its beauty and lifespan.
Understanding the Basics of Laying a Patio
A patio can significantly enhance the visual appeal and functionality of your outdoor space. However, laying a beautiful patio using black slate requires careful planning and execution. Understanding the basics is crucial to ensure that the finished product not only looks great but is also durable and well-constructed. You’ll need to familiarize yourself with the various elements involved in the process, from preparation to installation, to ensure success.
Factors to Consider Before Starting Your Project
Little details can make a world of difference when laying your patio. To kick things off, there are several factors you must consider before initiateing on your project to guarantee that everything runs smoothly. These include:
- Location: Determine where you want to lay your patio, considering sunlight, shade, and accessibility.
- Size: Assess the space available and establish how large you want your patio to be.
- Drainage: Ensure your patio design accounts for proper water drainage to avoid future issues.
- Tools & Materials: Make a checklist of tools and materials required for the project, particularly the necessary amount of black slate.
Assume that you’ve taken all these factors into account, and you’re ready to begin. Proper preparation will lead to a professional-looking finish.
Choosing the Right Black Slate for Your Patio
Before you start laying your black slate patio, it’s important to choose the right type of slate. The quality and look of your slate will have a significant impact on the overall aesthetics of your space. When deciding on black slate, think about factors like thickness, finish, and color variation. Thicker tiles tend to be more durable and provide a solid foundation for foot traffic.
Factors to keep in mind include the slate’s origin, as some sources produce slabs with unique appearances and strengths. Additionally, you’ll want to consider the finish; honed or textured black slate can offer different aesthetics and grip qualities. Choose an option that complements your outdoor design and requirements for slip resistance without sacrificing style. Remember that the right choice will not only enhance your patio’s look but also ensure a safe and long-lasting surface for your gatherings.
Preparing the Site
Some of the most crucial steps in laying a beautiful patio using black slate involve preparing the site properly. Proper preparation not only ensures a smooth installation but also extends the lifespan of your patio. Following the right approach will help you avoid costly mistakes and make your DIY project a success.
Clearing the Area and Removing Debris
Clearly, the first thing you need to do is clear the area where you plan to lay your patio. Start by removing any existing plants, furniture, or outdoor decorations from the site. This will give you a clean canvas for your new patio. Don’t forget to check for any hidden debris, such as old roots, that may interfere with your installation—removing these can aid in achieving a flat surface.
Next, focus on getting rid of any loose dirt, rocks, or other debris. This can be done with a shovel and rake to ensure that the area is as flat and clean as possible. If you encounter large boulders or substantial debris, consider using a wheelbarrow for easy disposal. A clean worksite is vital for a successful patio installation!
Leveling the Ground and Checking for Drainage
Preparing the ground for laying your black slate patio requires careful leveling and drainage consideration. Start by checking the ground for levelness; an uneven surface can cause your slate to crack or shift over time. You can use a level tool to identify high and low spots in your area and make adjustments as necessary.
Moreover, drainage is a crucial factor in your preparation process. Ensure the ground slopes slightly away from your home to prevent water pooling, which can damage both your patio and the structure of your house. Proper drainage not only protects your investment but also maintains the integrity of your patio’s appearance.
It is vital to remember that the ideal slope for drainage is found within a range of 1-2% away from your home or any other structures. This slight gradient allows water to flow freely, minimizing the risk of soaking or shifting any of your materials, thus keeping your black slate looking pristine for years to come.
Laying Down a Weed Barrier and Sand Base
Area preparation doesn’t end with leveling; you also need to lay down a weed barrier and sand base to ensure your patio remains free of unwanted growth. Begin by placing a weed barrier fabric over the level ground to suppress weed growth. Make sure it overlaps at the edges to prevent any unintentional gaps where weeds could grow.
After securing the weed barrier, add a layer of sand — around 1-2 inches thick. The sand will create a solid base for your black slate, allowing you to set the stones evenly without risking uneven surfaces or misalignment. You can use a screed board to level the sand precisely, ensuring your patio stones will stay firmly in place.
Weed barriers are critical in your preparation as they not only block growth but will also enhance the longevity of your patio by keeping it clean and aesthetically pleasing. A proper sand base further develops stability, minimizing the chances of uneven settling in your black slate patio.
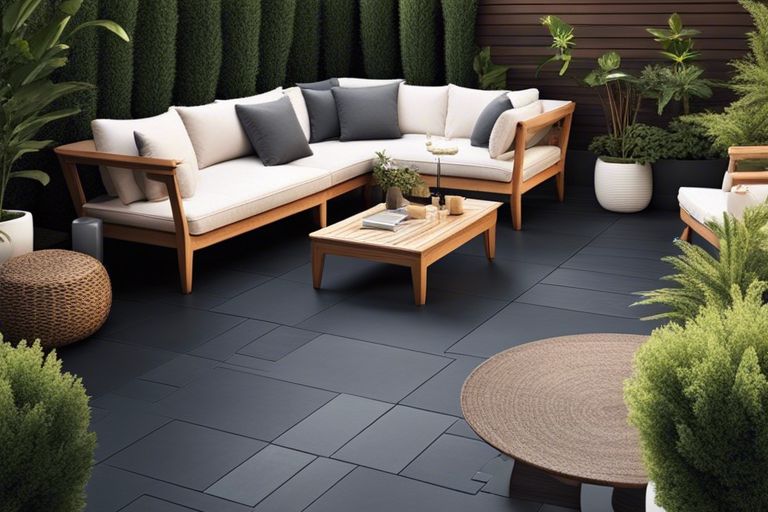
Laying the Black Slate Tiles
Despite the meticulous planning involved in laying your black slate patio, the process can be incredibly rewarding when you see the final outcome. The beauty and elegance of black slate can transform any outdoor space, making it a stunning addition to your home. Once you have prepared the ground and ensured everything is set, it’s time to get started with the actual tile laying process.
Starting with the First Row and Working Your Way Up
There’s a special satisfaction in starting your first row of tiles. To do this effectively, you’ll want to begin in a corner or the most visible part of your patio. Lay your first tile down and make sure it is level with the ground you prepared. This first row sets the foundation for the rest of your work, so take your time to ensure it’s perfectly aligned. Then, using a rubber mallet, gently tap the tiles into place while maintaining the right level.
As you work your way up, lay the rest of the tiles in a straight line, continuing the pattern you desire. It’s crucial to keep measuring as you lay each subsequent tile. Make decisions about the design as you go, whether you want a straight layout or a more creative pattern. Remember that patience is key here, and ensuring each tile is properly laid will save you time and effort later on.
Using a Spirit Level and Spacers for Accurate Alignment
Working with a spirit level is imperative for achieving precise alignment. Place the level on each tile after it’s laid and adjust as necessary. To ensure your tiles are evenly spaced, use spacers to create uniform gaps between them. This step is vital for both aesthetic appeal and allowing for grout later. The right spacing can help prevent cracking and shifting in the future, enhancing the longevity of your patio.
With this technique, you not only ensure a uniform look but also improve overall stability and longevity of the patio. Make sure to check the level and alignment frequently as you lay down more tiles. If any sanctuary of unevenness arises, don’t hesitate to make adjustments before the adhesive sets.
Cutting Tiles to Fit Around Obstacles and Edges
Clearly, you may encounter obstacles such as pipes, garden edges, or even steps as you lay your patio tiles. This is where precision cutting comes into play. You’ll need a tile cutter or a wet saw for the job, especially since black slate can be challenging to cut without proper equipment. Measure the space around obstacles carefully, mark where cuts are needed, and proceed with caution to ensure a clean cut.
Tiles can break easily due to their natural composition, so always prioritize safety by wearing protective eyewear and gloves. Measure twice and cut once; taking your time will yield the best results. It’s imperative to ensure the cut tiles fit snugly against the edges and obstacles without leaving any unsightly gaps.
Tiles that fit well will create a seamless look that complements the beauty of your black slate patio. This finishing touch not only maintains a polished appearance but also protects against water pooling and erosion over time.
Tips for Achieving a Professional Finish
Now that you’ve laid the foundation for your black slate patio, achieving a professional finish is crucial for both aesthetics and durability. Here are some necessary tips to consider:
- Ensure proper leveling of the slate tiles for an even surface.
- Use a strong but flexible grouting material to accommodate any slight movements.
- Incorporate high-quality sealers to protect your patio from the elements.
- Pay attention to the joints and edges for a polished, finished look.
The effort you put into these details will significantly enhance the longevity and visual appeal of your patio.
Using a Rubber Mallet and Tamping Tool for Secure Fitting
While laying your black slate tiles, using a rubber mallet and a tamping tool is instrumental in achieving a secure fit. Begin by gently tapping each tile into place with the mallet, ensuring that they sit snugly against one another. This technique not only helps in leveling out the surface but also reduces the risk of cracks or shifts over time. The tamping tool should be used to evenly compact the surrounding materials, giving your tiles additional stability.
Furthermore, you’ll want to pay attention to the edges of the patio. As you tap the tiles down, look for any gaps that may appear and adjust them accordingly. If necessary, you can use spacers to maintain uniformity and make adjustments easier. This careful attention to detail will pay off in the long run, as a well-laid surface leads to a stunning, durable finish.
Grouting and Sealing the Tiles for Durability
Achieving the right seal for your patio involves careful grouting and a thorough sealing process. After ensuring all tiles are level and secure, it’s time to fill in the joints with grouting material. Choose a flexible grout that can withstand outdoor conditions, as this will help prevent cracking. Once you’ve completed the grouting, let it cure as recommended and then follow up with a high-quality sealant. This step is vital to protect your black slate tiles from water damage and staining.
Finish your project by applying an adequate amount of sealant across the entire surface. This final step provides a protective barrier against wear from foot traffic, prevents discoloration caused by the sun, and enhances the natural beauty of your slate. Always follow the manufacturer’s instructions on drying and curing times for optimum results.
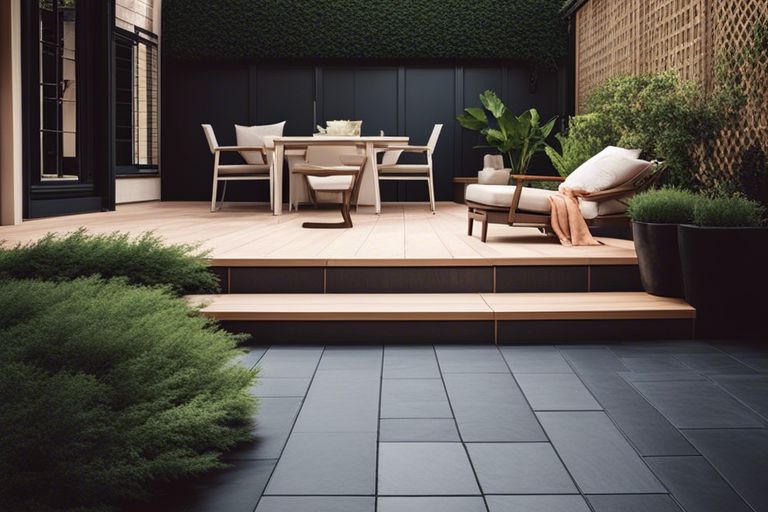
Adding Finishing Touches with Edging and Jointing
Rubber edging can significantly enhance the look of your black slate patio, making it visually appealing and functional. After grouting, consider adding edging to define the boundaries of your patio. This not only provides a clean, finished look but also helps in preventing grass or dirt from creeping into your patio area. You can use stone, wood, or metal edging depending on the desired aesthetic.
Once you’ve installed the edging, use a jointing compound to fill any remaining gaps between the tiles and the edging materials. This ensures a seamless transition and adds more security against shifting. By carefully applying these finishing touches, your patio will look professionally installed, creating an inviting outdoor space for years to come.
Finishing your patio project with these necessary details can be the difference between a standard installation and a breathtaking outdoor haven. With strategic planning and attention to detail, you’ll be proud to showcase your new black slate patio to friends and family. The commitment to quality in your finish will ensure that your space remains not only beautiful but also durable and functional for all your outdoor activities.
Common Mistakes to Avoid
All of us strive for a stunning patio experience, but it’s easy to make mistakes that can compromise the overall look and durability of your black slate installation. Recognizing these common pitfalls can save you time and money, ensuring that your patio remains beautiful and functional. Here, we highlight the key mistakes you should avoid during your project to achieve the best results.
Inadequate Preparation and Insufficient Drainage
Even the most beautiful slate will falter if the surface is not adequately prepared prior to installation. It’s crucial to remove any existing grass, weeds, and debris, as they can disrupt your new patio’s integrity. Make sure to create a solid base of compacted gravel and sand for optimal stability. Additionally, proper drainage is crucial; without it, water will accumulate and threaten the longevity of your patio. You can enhance your drainage solutions by consulting resources like the SmartSide Siding Color Chart, ensuring your landscape works harmoniously with your design.
Inadequate drainage can lead to a host of issues, including Erosion and mold growth, which can damage your slate over time. When planning your patio, consider grading the ground away from any structures and including drainage channels to minimize water accumulation. By addressing these preparation and drainage concerns upfront, you’ll set the stage for a long-lasting and visually appealing outdoor space.
Incorrect Tile Alignment and Inconsistent Grouting
Incorrect tile alignment and inconsistent grouting can ruin an otherwise well-installed patio. If your tiles are not aligned properly, it will be quite noticeable and detract from your design’s elegance. Ensure that you take your time during the layout process, using spacers and levels to guarantee even spacing while adhering to a grid pattern. Additionally, inconsistent grouting affects the overall aesthetic and can lead to uneven wear and tear over time.
It is also vital to consider the type of grout you are using. Whether you choose sanded or unsanded grout, make sure to follow the manufacturer’s instructions closely. Inconsistent grout lines not only look unprofessional but can also allow water to seep through, leading to damage beneath your slate tiles.
Failure to Seal the Tiles and Protect from the Elements
Some homeowners overlook the importance of sealing their slate tiles, assuming that the natural stone is already protected. However, without proper sealing, your tiles can become susceptible to stains, moisture penetration, and other forms of damage. It’s important to apply a high-quality penetrating sealer after installation to guard against these risks and maintain the slate’s rich color and finish.
Common mistakes in sealing include using the wrong product or neglecting to reapply the sealant regularly. Make it a routine to check your patio’s condition and reapply the sealant as needed, typically every one to three years, depending on your climate and the level of seasonal wear and tear. By taking these precautions, you will ensure that your black slate patio remains stunning and resilient for years to come.
Additional Tips and Tricks
To enhance your experience in laying a beautiful patio, here are some additional tips and tricks that can make a significant difference in your project:
- Plan your layout carefully to maximize the beauty of your black slate materials.
- Use the right tools to ensure precision and efficiency during installation.
- Seal your slate to protect it from the elements and enhance its natural beauty.
- Consider the drainage options to avoid any water pooling on your new patio.
- Take your time when setting each piece to ensure a uniform look and feel.
Any attention to detail at each stage will contribute to a stunning outdoor space that you can enjoy for years to come.
Using Black Slate to Create a Unique Pattern or Design
You can create an eye-catching pattern with black slate by experimenting with different shapes and sizes. Whether you opt for a classic rectangular layout or something more intricate, such as stones arranged in a circular pattern, the possibilities are endless. Your imagination is the limit, and a well-planned design can serve as a focal point in your garden or backyard.
Furthermore, consider incorporating contrasting colors or textures within your pattern. A combination of black slate with lighter stones or even bricks can create a striking visual effect. This touches on the idea of personalization – by choosing how you want to pattern your stones, you’re crafting a space that truly reflects your own style.
Incorporating Other Materials for a Mixed-Media Look
One fantastic way to elevate your patio design is by incorporating other materials alongside your black slate. You might consider integrating timber decking or natural stone features for a beautiful, cohesive look. This mixed-media approach can add dimension and texture to your outdoor space, making it feel more dynamic and engaging.
In addition, using gravel or sand in conjunction with your slate tiles can enhance drainage and provide a naturalist aesthetic. By selecting materials that harmonize with black slate, you can truly achieve a unique and personalized design that stands out.
Adding Lighting and Furniture to Complete the Patio
Using the right lighting can dramatically transform your black slate patio into an enchanting evening space. Consider installing LED lights along the edges or recessed lighting within the slate itself to create ambiance. Table lanterns or string lights overhead can also provide a warm and inviting glow, perfect for nighttime gatherings.
Equally important is the inclusion of comfortable, stylish furniture that complements the overall ambiance of your patio. Choose weather-resistant seating that resonates with the colors and textures of your slate. Outdoor cushions in vibrant hues can provide a contrast that makes the slate’s deep color pop while enhancing your comfort.
It’s important to remember that the comfort and style of your furniture can make or break the overall look of your patio space, making it important to select wisely.
Any effort you put into lighting and furnishings will complete your outdoor oasis, ensuring it’s both functional and aesthetically pleasing.
Final Words
Upon reflecting on the process of laying a beautiful patio using black slate, you can appreciate how rewarding this project can be. By carefully following the tips and tricks outlined in this guide, you are equipped to create an elegant and durable outdoor space that enhances your home’s aesthetics. Be mindful of, the attention to detail in the preparation and installation phases pays off in achieving a flawless finish, so take your time and don’t rush the process. Your new black slate patio will not only serve as a stunning focal point but also as a lasting testament to your craftsmanship.
As you step back to admire your finished patio, take pride in knowing you’ve transformed your outdoor living area into a stylish retreat. With the right maintenance and care, your black slate patio will continue to shine and provide you with enjoyment for years to come. Whether you’re hosting gatherings or enjoying quiet moments alone, your patio will surely become a cherished part of your home that you can be proud of.
FAQ
Q: What materials do I need to lay a beautiful patio using black slate?
A: To successfully lay a black slate patio, you will need several materials:
1. Black slate tiles: Ensure they are of good quality and consistent thickness.
2. Jointing compound: A suitable resin or sand-based grout can be used for filling the gaps between the stones.
3. Adhesive: A high-quality paving adhesive or mortar mix is necessary for securing the tiles to the base.
4. Sand and gravel: To create a solid base, a mix of sand and gravel will help with drainage and stability.
5. Tools: Basic tools include a trowel for the adhesive, a rubber mallet, a level, a measuring tape, and a tile cutter for precise fitting.
6. Safety gear: Don’t forget gloves and safety glasses to protect yourself while working.
Q: How do I prepare the ground before laying black slate tiles?
A: Preparing the ground is a crucial step for ensuring a long-lasting and aesthetically pleasing patio. Begin by:
1. Marking the Area: Use stakes and string to outline where you want the patio.
2. Excavating: Dig down to a depth of approximately 10-15 cm, removing any grass, roots, or debris.
3. Creating a Base: Fill the excavated area with a mixture of gravel and sand, compacting it thoroughly to create a stable foundation.
4. Leveling: Use a level to ensure that the ground is even and slopes slightly away from any structures for effective water drainage.
5. Setting a Border: Consider placing edging stones or a border to keep the slate tiles in place and prevent shifting.
Q: What is the best way to maintain a black slate patio after it is installed?
A: Maintaining your black slate patio will help preserve its beauty and longevity. Follow these tips for upkeep:
1. Regular Cleaning: Sweep the patio regularly to remove dirt and debris. For deeper cleaning, use warm soapy water and a sponge or mop, avoiding harsh chemicals that might damage the slate.
2. Sealant Application: Consider applying a stone sealer every few years to protect the slate from staining and to enhance its natural color.
3. Joint Maintenance: Check the joints regularly for any cracks or gaps and repair them with new jointing compound to prevent weed growth and water infiltration.
4. Seasonal Care: In colder months, use a plastic shovel to remove snow instead of metal to avoid scratching the slate. Treat any salt or ice-melting agents used with caution as they can damage the slate over time.