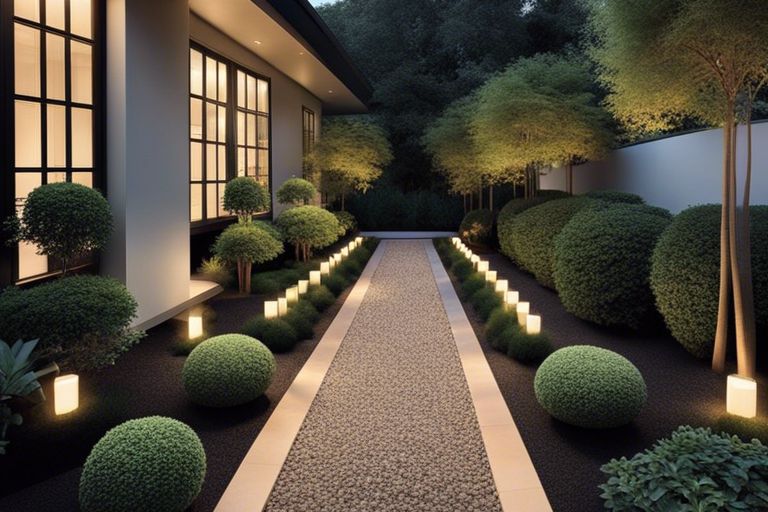
There’s a certain sophistication that comes with using black granite chips in your pathway design. These striking stones not only add elegance but also provide a durable surface that can withstand the elements. In this guide, you’ll discover five imperative steps to seamlessly incorporate these chips into your outdoor spaces, enhancing both the aesthetic appeal and functionality of your pathways. Whether you’re looking to create a modern walkway or a rustic garden path, black granite chips will elevate your design. Let’s get started!
Key Takeaways:
- Step 1: Assess your pathway layout to determine the best spots for incorporating black granite chips, enhancing both aesthetics and functionality.
- Step 2: Choose the right size and texture of black granite chips to complement the overall design and ensure safety while walking.
- Step 3: Incorporate a binding agent to keep the granite chips in place, ensuring durability and maintaining the look of your pathway over time.
Selecting the Right Black Granite Chips
Before you examine your pathway design, it’s imperative to understand the various options available for black granite chips. They come in different sizes, textures, and finishes, each offering a unique effect on the overall look of your pathway. Selecting the right black granite chips will ensure that your pathway harmonizes with your landscaping and meets your functional needs. Take the time to evaluate your choices carefully, as this can significantly influence the aesthetic and durability of your pathway.
Considerations for Color and Texture
Right from the start, color and texture play crucial roles in the selection process. Consider how the black granite will contrast or blend with other elements in your landscape. Some chips are more polished, resulting in a sleek look, while others are rougher and provide a more natural feel. Remember that the shine and color depth can change throughout the day as light conditions fluctuate, so choose wisely to achieve the effect you desire.
Moreover, think about the functionality of your pathway. If it sees heavy foot traffic, you might prefer a coarser texture for better grip. Conversely, for a decorative path where aesthetics are more critical than practicality, finer, more polished chips may be suitable. Balancing these two factors will set the foundation for an appealing and functional pathway.
Sourcing High-Quality Black Granite Chips
Chips come in various qualities, and sourcing high-quality black granite chips is vital for ensuring longevity and visual appeal. When shopping, seek out suppliers who specialize in natural stone materials. Research the supplier’s reputation and verify that their products are ethically sourced and tested for durability. This step will save you potential headaches down the line, as inferior chips may crumble or discolor over time.
Texture and size variations can also indicate quality. Look for chips that are uniform in size and shape, which ensures a smooth surface when laid. Additionally, be cautious of bulk suppliers who may offer lower prices; prioritize quality over cost to avoid compromising your design’s integrity. Investing in high-quality black granite chips may come at a higher upfront cost, but it ultimately saves you money through reduced maintenance and replacement over the years.
Preparing the Pathway Site
If you envision a striking pathway adorned with black granite chips, the first imperative step is preparing the site for your project. This will ensure that your pathway not only looks great but also functions effectively. As you begin on this journey, you may find helpful resources on how to approach pathway design, like How to Create a Kitchen Garden Pathway. This guide will assist you in understanding the fundamental aspects of pathway construction.
Clearing the Area of Debris and Vegetation
Preparing your pathway begins with clearing the area of debris and vegetation. This step is crucial as any existing materials, such as weeds, rocks, or broken branches, can disrupt the integrity of your pathway. Use a garden spade or shovel to dig up roots and ensure there’s a clean slate for your black granite chips. Take the time to carefully inspect the area; you want to achieve a clear and open space that will allow for proper drainage and aesthetics.
Leveling the Ground for a Smooth Surface
Ground preparation is paramount; leveling the ground will provide you with a stable and smooth surface for your pathway. Start by using a rake to even out the soil, removing any uneven spots or bumps. You may need to add or remove soil to achieve the correct height and level. It’s vital to create a compact surface to avoid future sinking or shifting of the pathway. If you want an exceptionally smooth finish, consider using a tamper to ensure the soil is adequately packed down.
It’s worth noting that a properly leveled ground not only enhances the appearance of your pathway but also ensures long-term durability. A stable surface prevents the pathway from developing cracks or uneven spots over time, allowing the black granite chips to settle neatly into place. The initial effort you invest in leveling will pay off significantly in the overall look and longevity of your pathway.
Laying the Black Granite Chips
Unlike other materials, laying black granite chips can transform your pathway into a sleek, modern pathway that enhances the overall aesthetic of your garden or property. In this chapter, we’ll research into the necessary steps to achieve a durable and visually appealing finish, ensuring your effort yields the best results.
Creating a Solid Base with Compacted Gravel
Laying a solid foundation is critical to the longevity and functionality of your pathway. Start by excavating the area designated for your pathway to a depth of about 4 to 6 inches, depending on the expected traffic and the base material you will use. After leveling the ground, you should lay down a layer of compacted gravel, which will provide excellent drainage and prevent the black granite chips from sinking into the soil over time. Make sure to compact the gravel thoroughly to create a sturdy base that will support the weight and usage of your pathway.
Additionally, it’s necessary to ensure that the gravel layer is well-mixed and consistent throughout. You can achieve this by using a plate compactor or a hand tamper for small areas. A solid base not only serves to keep your pathway firm and stable but also works as a drainage system, safeguarding your design from water accumulation. Bear in mind, a strong start is halfway to the finished product!
Spreading the Black Granite Chips Evenly
To achieve a stunning look, spreading the black granite chips evenly over your compacted gravel base is crucial. Pour the chips onto the prepared surface using a wheelbarrow or shovel, ensuring an even distribution throughout the area. Aim for a thickness of about 1 to 2 inches, depending on the desired appearance and the size of the chips, as thicker layers can lead to uneven settling and increase the potential for shifting.
Gravel surfaces can vary in texture and appearance, which makes spreading your black granite chips uniformly necessary for achieving a polished look. Take your time with this step, as it can have a significant impact on your pathway’s final aesthetic. Unevenly spread chips can not only look unattractive but can also pose hazards such as tripping. A careful approach ensures your pathway is both beautiful and safe to navigate.
Raking the Chips for a Uniform Look
Gravel raking is a fundamental step that helps you achieve a refined finish. After spreading the chips, grab your rake and start evenly distributing them across the surface. Work in sections to ensure you don’t miss any spots, adjusting the depth as needed for an even appearance. This is not just about aesthetics—it’s also about safety. An uneven pathway could easily cause trips and falls, so consistency in chip depth is paramount.
Gravel pathways often benefit from an additional rake-out once you’ve completed the initial application. Going over the surface again allows you to address any areas that may have settled or accumulated more chips than others. This enforcement of evenness showcases the black granite’s striking color and ensures maximum longevity for your design. By taking the time to rake meticulously, you create a professional-looking surface that enhances both the visual appeal and functionality of your pathway.
Compacted materials beneath the granite chips are your secret weapon for stability and drainage, which helps maintain your pathway’s charm for years to come. Don’t underestimate the importance of these finer details; they are what distinguish amateur paths from those that truly impress.
Designing the Pathway Pattern
Once again, the aesthetic choices you make will play a crucial role in how well your pathway integrates into your landscape. Designing the pattern of your pathway is not merely about functionality; it’s an opportunity to express your personal style and enhance your outdoor space. By carefully considering the layout, you can create a visually appealing pathway that draws people in and guides them through your garden or yard.
Choosing a Pattern: Linear, Curved, or Random
One of the first decisions you’ll need to make is the pattern of your pathway. A linear design delivers a formal look and works well in more structured gardens. If you prefer a softer, more organic feel, consider opting for curved lines that mimic the natural flow of your landscape. But perhaps you’re feeling adventurous—choosing a random pattern can add a touch of whimsy and spontaneity, making the pathway feel less contrived and more inviting.
As you weigh your options, think about the overall design of your space and how the pathway will complement it. Each pattern has its advantages: linear might be less labor-intensive to install, while curved or random patterns can enhance the aesthetics significantly. Surveys show that well-designed pathways can lead to increased enjoyment of outdoor spaces, so make a choice that resonates with your vision.
Creating Visual Interest with Contrasting Materials
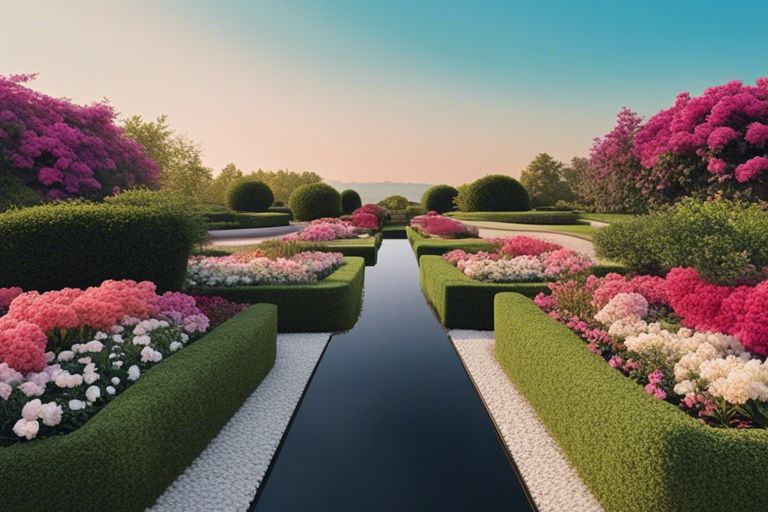
To add depth and excitement to your pathway, consider incorporating contrasting materials. Black granite chips are stunning on their own, but by mixing them with other elements like white gravel, stone slabs, or even wooden borders, you can create a striking visual impact. These contrasts can help emphasize the beauty of the black granite and create a memorable focal point in your garden.
Another way to achieve visual interest is by varying the size and shape of the materials used. For instance, consider using larger pavers interspersed with the fine black granite chips. This method not only breaks up the monotony but also invites guests to engage with the pathway in a tactile way, enhancing their overall experience.
Considering Drainage and Water Flow
Drainage is an often-overlooked aspect of pathway design, yet it can mean the difference between a long-lasting walkway and one that quickly deteriorates. When designing your pathway, ensure that it has an adequate slope to facilitate proper water flow. This is crucial for preventing water pooling, which can lead to erosion of the black granite chips, making them less stable over time.
Pathway materials like black granite chips can aid drainage, but they need to be installed with care. Incorporating larger stones into your design can help create channels for the water to flow, preventing your pathways from becoming slick and potentially hazardous. Additionally, strategically placed drainage solutions can keep your pathways looking great while protecting your investment.
Edging and Bordering the Pathway
After you have laid down your black granite chips, it’s imperative to establish a clear boundary for your pathway. Edging not only enhances the visual appeal of your landscape but also serves a practical purpose by preventing the granite from spilling into surrounding areas. An effective border can help maintain the integrity of your design and keep your pathway well-defined, which is particularly important if you’re incorporating elements like grass or flowers nearby.
Selecting the Right Edging Material
One of the first considerations you’ll need to make is the material for your edging. There are several options available, including wood, stone, metal, or even plastic. Each material offers a unique aesthetic and functional advantage. For a more natural look that complements the elegance of black granite, consider using natural stone or treated wood. These materials create an organic transition between your pathway and the rest of your garden.
You should also contemplate durability and maintenance when selecting your edging material. Metal edging, such as aluminum or steel, is incredibly strong and can withstand the pressure of the granite chips while maintaining a sleek look. On the other hand, if you prefer a more rustic charm, wooden borders can degrade over time but bring warmth and character to your pathway.
Installing Edging to Contain the Black Granite Chips
On starting the installation process, ensure that your chosen edging is set firmly in place. Begin by marking the outline of your pathway with stakes or string, providing a clear guide for laying out the edging material. Dig a narrow trench along this outline, ensuring it is deep enough to accommodate your edging while keeping it level with the surrounding ground. This will help create a clean and professional finish.
It is crucial to secure your edging material properly so that it can withstand the weight and movement of the black granite chips. This may involve using stakes or spikes to anchor the material to the ground effectively. Make sure that the edging rises just slightly above the top of the chips; this will act as a barrier, preventing the stones from dispersing into your surrounding landscape. Failing to install a secure border can result in a messy appearance and potentially compromise the function of your pathway. With the right edging and proper installation, your pathway will not only be beautiful but also highly functional.
Maintenance and Upkeep
Keep your pathway looking pristine by maintaining it regularly. The use of black granite chips adds a sleek and modern texture to your landscape, but it also requires consistent care to ensure it remains aesthetically pleasing and functional. Proper maintenance not only enhances the beauty of your pathway but also extends the lifespan of the materials. With just a few simple tasks, you can preserve that striking appearance and prevent common issues like weed growth and chip depletion.
Regular Raking to Prevent Weed Growth
Raking your black granite chips on a consistent basis helps to prevent the intrusion of unwanted weeds. Over time, organic matter can accumulate within the chips, creating a hospitable environment for weed seeds to germinate. By raking the surface, you dislodge any seeds and maintain an even distribution of the chips. This simple practice is key to keeping your pathway not only beautiful but also functional, ensuring that weeds don’t detract from the overall appearance.
Moreover, regular raking serves to maintain the stability of the pathway. Compacting the surface helps to prevent shifting or settling of the granite chips, which can lead to uneven pathways and make navigation difficult. A well-maintained surface allows for easier access while also providing a safe footing, particularly during wet weather when surfaces can become slippery.
Replenishing Black Granite Chips as Needed
For optimal results, make it a habit to periodically assess your pathway and replenish black granite chips as needed. Over time, the chips may become displaced due to weather conditions, foot traffic, or natural erosion. Recognizing when to add more chips is crucial to maintaining a robust surface and keeping the aesthetic appeal intact.
Granite chips not only provide an elegant finish but also serve practical purposes. As the pathway ages, **the color may fade** or **the chips may become compacted**, diminishing their visual impact. Adding new chips can revitalize your pathway and ensure that it remains a highlight rather than a neglected area of your outdoor space. Remember that **neglecting this task can lead to larger issues**, such as reduced safety and increased maintenance costs in the long run. By being proactive about replenishing your granite chips, you are investing in the longevity of your pathway.
Summing up
Ultimately, incorporating black granite chips into your pathway design is a straightforward yet impactful way to enhance the aesthetic appeal of your outdoor space. By following the five steps outlined, you can seamlessly integrate these elegant stones into your existing landscape. This not only adds a modern touch but also ensures durability and low maintenance for your pathways. Whether you opt for a bold border or a subtle accent, the versatility of black granite chips can elevate your garden or walkway to new heights.
As you initiate on this creative journey, remember that your pathway is more than just a means of navigation; it’s an extension of your personal style and an invitation for guests to explore your outdoor haven. With careful planning and the right techniques, you can transform your space into a beautiful and inviting area that showcases the stunning contrast of black granite against your greenery. So take the plunge and let your pathway reflect your unique vision!
FAQ
Q1: What are the benefits of using black granite chips for pathway design?
A: Black granite chips are not only aesthetically pleasing but also provide several benefits for pathway design. These chips are durable and can withstand heavy foot traffic, reducing the need for frequent repairs or replacements. Their dark color helps absorb heat, melting snow and ice faster in colder climates, which can improve safety. Additionally, black granite chips can create a modern and elegant look, complementing various landscaping styles.
Q2: How do I prepare the ground before laying black granite chips in my pathway?
A: Preparing the ground for black granite chips involves several key steps. First, measure and mark the desired pathway layout. Next, excavate the area to a depth of about 3-4 inches, removing any old material, roots, or debris. After that, ensure the ground is level and compacted, which helps with drainage and prevents settling. Consider laying a weed barrier fabric to keep weeds at bay, and if necessary, install edging to define the pathway’s borders.
Q3: How do I maintain a pathway made with black granite chips?
A: Maintaining a pathway made with black granite chips is relatively easy. Regularly sweep the pathway to remove leaves and other debris that may accumulate. If you notice weeds starting to grow, you can manually remove them or apply a safe herbicide. Periodically replenish the chips to maintain a consistent depth and appearance, especially after heavy rains or usage. If the pathway becomes uneven, simply rake the chips back into place to ensure a smooth surface.